A couple of months ago, I participated with a few friends in a "Toddler Busy Bag Swap." There were 6 of us, and we each chose 1 toddler friendly project/toy/activity to make, and we made 6 of them. Then we all got together, had some food, and exchanged our projects. That way, we each went home with 6 different activities for our little ones.
I made felt finger puppets, and just like every project that I do, I went a little overboard. I made 10 different animals, and I made 10 of each animal! I thought it would be good to have a couple extra to use as gifts. Well, by the time I finished, I decided that 10 finger puppets was a little much. My child would want to put them all on at one time, and that would get super annoying...so I decided to put 5 animals in each "farm." Which gave me 20 little farms!! I used 6 for the swap, and I've used a few for gifts. Kids ages 2-3 really love them!!
It took me about 3 weeks to complete the animals and the barn carry bag...this is working during naptime, and some evenings. I used my sewing machine to sew together the basic puppet, and then used hot glue to attach the various felt/eyes/etc that made up the animal. Here are pictures of each animal!!
Chicken!!
Sheep!
Cow!
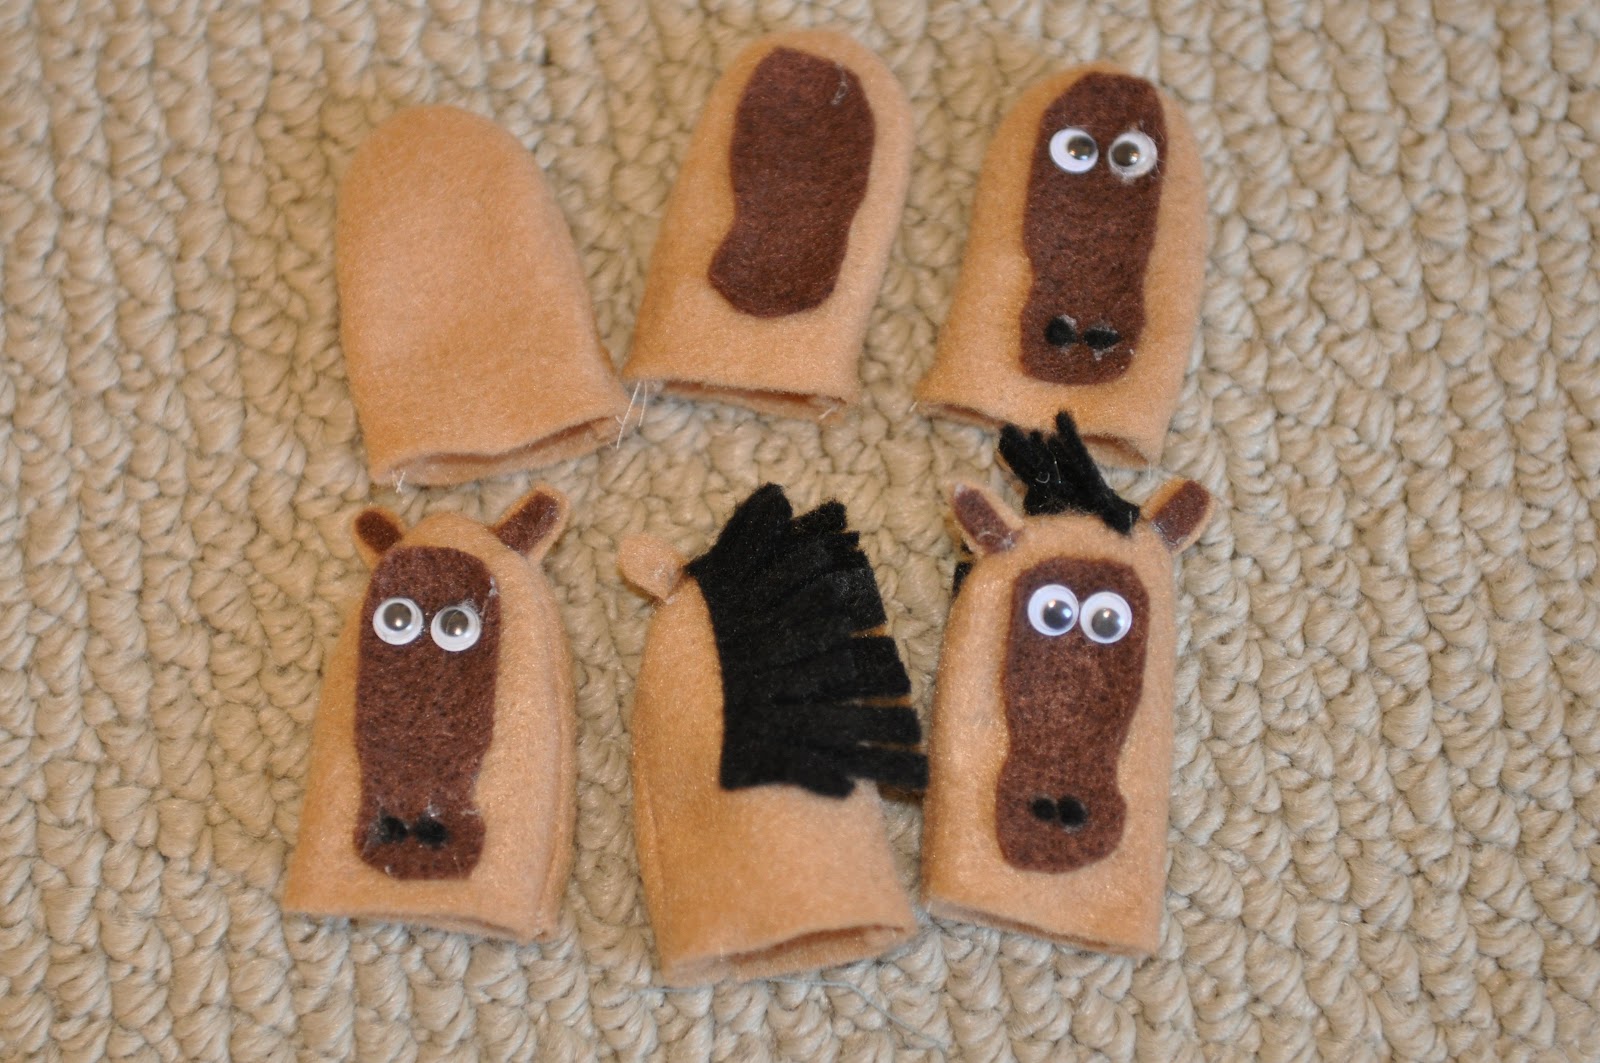
Horsie!
Pig!
Puppy Dog!
Duck!
Bird!
Mouse!
Cat!
Then, the barn carry bag. My daughter, who is 2 & 1/2, loves taking the animals in and out of the bag. She calls it her farm, and she gets excited when we give a farm to one of her friends.
These are the pieces for the barn. First I sewed the long bottom piece to the bottom of the front and back pieces.
Then, I folded the bottom piece in half so that the front/back were flush, and sewed up the sides.
Flip it inside out, and you're ready to make it look like a barn!
I glued pipe cleaners around the outline of the barn.
Then I used pipe cleaners to create the barn door and window.
Then I forgot to take pictures of teh finished barn!! I used the short yellow pieces above and cut them to look like hay, then glued them into the window. The top of the bag is open, and I glued a small square of velcro to close.
These were a lot of fun to make, and it was fun looking around on the internet for ideas and creating the little guys!