Thursday, November 24, 2011

Power Rangers Cake

 This cake was for a 7-year-old boy's birthday.  It was a little last minute, so his mom made it easy on me by buying the power rangers figurines.  The cutouts are fondant, the icing is buttercream, and the cake is a 2-layer vanilla cake, made rainbow style!!
I tinted the icing red/blue/green, then swirled and layered it into the pan.

One last cool thing...
I made my lightning bolt fondant cutter out of a coke can!  And...I didn't cut myself!!


--November 2011


Minnie Mouse Cake

This cake was for my sister-in-law, who just turned 1 in August.  My mother-in-law wanted to do a Minnie Mouse party, since Alana had been to Disney World 3 times before she turned 1!!  

The cake was a 2-layer chocolate, with pink fondant icing and fondant embellishments.  I used a "sports ball" pan for the mouse head, and did the ears out of fondant. 

Her smash cake was a giant cupcake, iced with buttercream.  It took her a little while to get into it, but she finally dug in and enjoyed the cake with the rest of us.
Thumbs up!!  I think she approves!


--November 2011

Princess Cake

Happy birthday to a cute little princess!!  The birthday girl wanted a princess crown that she could wear for her birthday, so that made the planning of the decorations fairly simple!  The cake is a 2-layer golden vanilla, with fondant icing.  The embellishments are buttercream, with light pink pearls.  I've still got some practicing to do on my scripting...


--October 2011

Army Cake

This cake was for my nephew's birthday party.  He had planned to have a sleepover with a few of his friends, and play "Capture the Flag" with them.  So we decided an army cake would be fun.  (Turns out his dad surprised him by hiring a laser tag company to come out, and he and his friends got to play laser tag - coolest birthday party ever, huh??!)  
This was one of the easiest cakes I've done.  I wanted the icing to look like mud, so I didn't have to worry much about getting it smooth and neat.
I decided to make the cake "camo" inside, using a chocolate batter, and a vanilla batter tinted army green.  (I didn't get a good pic of the cut cake, however.)
The icing was a chocolate buttercream.  I tinted part of it army green, and part of it a darker chocolate, to get the gradient I wanted.  And of course my nephew had plenty of army men to decorate it with!!


--October 2011

Wednesday, November 16, 2011

To-Do List Follow Up

Well, it's been more like 3 weeks since my original post of things I wanted to do that week.  I really did get most everything done within a week, but then I had to add on taking pictures, getting them imported into my computer, and actually writing this post!! 

So - here are my accomplishments.

 I had to pull everything out of the closet before I could organize it.  
It looked like Michael's exploded!!
The boxes are things that were on the top shelf of the closet...old college yearbooks, old business notebooks, boxes of electronics we've bought that we need to keep for some reason, etc.  They all went in the attic crawl space, so I can get to them if necessary, but now I have the whole top shelf of the closet - that's where gift wrapping supplies and a few odds and ends go.


 I set up a station for my sewing machine (it's new, I'm teaching myself)...one side of the desk is computer/server stuff for my husband, and the other side is my stuff.  (I also added a folding table in the corner for cutting/ironing.)


And this is the beautiful organized closet!!  I cleaned Walmart out of their stackable containers...I haven't added up how much I spent yet.  :)  But I think it's worth it for the organization.  And I realized just how much yarn I have.  Most of the drawers are full of yarn.  I've got quite a few projects in my future!


This is the laptop sleeve.  The first one I measured wrong, so I turned it into an iPad case to give to my sister.  I love, and might be making some of these for Christmas gifts.  The liner is the same color as the buttons...I found DIY fabric button things at Joann's and just hot-glued them on.  The straps fasten with straps, because I haven't been brave enough to try to sew buttonholes yet.


My Ruffle bag!!  The first ruffle took me 2 hours, but the rest went on pretty fast.  I shall make some of these for Christmas gifts as well.


I ended up finding another old T-shirt to use to make this embellishment.  I didn't touch the stack in my closet, but I'm counting it anyway.  :)


Oh, my counter is so very neat now.  I got this coatrack from the Container store..the hooks fold up when not in use, so it's very sleek looking.  Things get a little smooshed when the door opens all the way, but it works.
The Crayon Family...Blue & Red make Purple!!  (I so didn't plan it that way, but it's pretty cool, huh??  Mine and the little are made from all felt...it was my first sewing project with my new machine.  Aaron's is just an embellished T-shirt, and he opted out of the hat (or "dunce cap" as he called it).

I finished 1 scarf for Special Olympics, and I'm halfway through another, but I failed to take pics of that.

And, I ended up doing an amazing job in the relay with an 11:05 average.  More detail here, if you want it.  

The to-do list was fun.  I make them all the time, and probably won't share them unless they're full of new, exciting (to me) projects like this one.  I've got a bazillion other projects in my head, but right now I'm working on Christmas decorating.  We're having at least 2 trees this year, perhaps 3.  Yay!!

So long...got to make wreaths while the child is napping!

Friday, November 4, 2011

Tutu Baby Shower

This cake was for a good friend's baby shower.  It's a chocolate cake with buttercream/raspberry filling.  The icing and embellishments are all fondant.  The theme of the party was baby girl, and the decorations were all kinds of tutu's so, I decided to make a tutu for the cake stand.  The colors for the cake came from that.

The cake turned out a little lopsided because of this...
My daughter took a handful out of the cake while it was cooling.  She didn't get in a lot of trouble, because I had never actually told her not to touch the cake.  (I do now, by the way!)

But, I thought the lopsided cake enhanced the whimsical look of the decorations, so it all worked out in the end.


October 2011

Safari Baby Shower Cake

I dabble in cakes....I've done a few, and I have fun with them.  And people think I'm amazing and creative.  But, here's my secret.  I'm not creative...I'm just a really good copycat!  :~
But, I do like to give credit...when I remember.  You should check out Kate's blog.  I'm throwing her name out there like I know her, but we've never met...I just follow her blog and drool over her cakes.  She actually lives close to me (I think), and one of these days I'm going to figure out how to meet her.  Her cakes are AMAZING!!  This one is the one I copied for my cousin's baby shower.
Go ahead...pull up both our blogs and compare the cakes.  Hers is better, but I think I did a pretty good job of replicating it.

This is the cake.  
Top layer was chocolate, with a buttercream & raspberry filling.
Bottom layer was vanilla, with a  buttercream & strawberry filling.
Blue icing and "grass" is buttercream.
The animals/palm trees are fondant.
The topper is actually a wooden craft store letter, that I Mod Podged scrapbook paper onto.  
The cake stand I also made, using a plastic platter from a party store, and a candlestick from Michael's.  I Mod Podged the same scrapbook paper around the edges.  (I later added a wider base, because the stand was quite wobbly.
I got really attached to my little fondant animals, so I named them.
This is Zeke the Zebra.
Hettie the Hippo.
Lori the Lion.
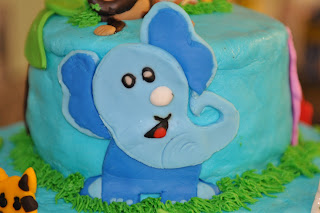
Earl the Elephant.
Merlin the Monkey
and, Gary the Giraffe.

My cousin LOVED it, but I admit, I was a little sad to cut and eat it.

Elmo Cake & Cake Pops

We had an Elmo themed party for my daughter's second birthday.  

I made cake pops for her to take to preschool for snack time.

 I was working on them during her nap time.  I was a little worried that she wouldn't "get it", but when she came into the kitchen and shouted "Elmo!!" I knew I had scored big.  And of course she had to taste test.  (I plan to ... one day ... do a post about the Elmo cake pop process.  I (mostly) followed this one from Bakerella, but I did a few things differently to make it go faster.


And this was the Elmo Cake.  I did a 14" 2-layer on the bottom, with white buttercream, then used the Wilton Elmo cake pan to do the face. For the eyes/nose/mouth, I again used Viva paper towels to smooth them, then piped TONS of tiny stars for Elmo's furry face.  I had to take a few breaks to rest my hand, because it kept cramping. 


--August 2011

Tuesday, November 1, 2011

4th of July Cake Pops

These cake pops were for one of my daughter's friends.  Her birthday is around the first of July, so her mom wanted to go with a patriotic theme for the birthday party.  The cake pops were vanilla/cream cheese, with a candy melt coating.  I had fun with the different colors and sprinkles, and the kids (and parents too!) loved them!!  I found the cute little tins for display in the $1 bin at Target.

--July 2011

Baby Shower Cake (Pink/Yellow/Zebra


This cake was for a friend's baby shower.  The person in charge of the decorations requested the colors, and I came up with the design.  The base is buttercream (I really struggled getting the right shade of pink!)  The embellishments are fondant.  The zebra print is Wilton Sugar Sheets - which are amazing!! I rolled out white fondant, adhered the sugar sheet, and used them to embellish.  The detail piping is also buttercream.  I cheated on the black, because I didn't want to have the taste of chocolate, and I used pre made decorator icing.

--June 2011

Rugrats 3rd Birthday Cake

This was the first really detailed cake I had ever done.  But Wilton makes it super easy!!  The client bought the cake pan for the Rugrats themed party.  To decorate, I just followed the step by step directions on the cake pan insert.  This was also one of the first cakes where I used a smooth buttercream base.  The trick to this is Viva paper towels.  No kidding!  Once you apply the icing, let it "crust over" for a few minutes.  Then, lay a Viva paper towel (and no other paper towel will work) over the icing, and smooth with your hands, or with a fondant smoother.  It's amazing!!


--June 2011